Tuesday, 11 November 2014

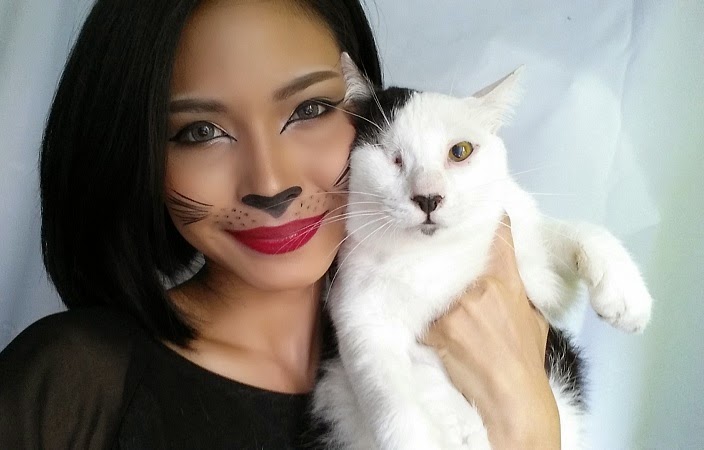
Halloween look | Kitty in Disguise


Here's another look that I did. Very easy! First, you do your normal makeup routine but only apply thicker blusher or even better, use a pink blusher to brighten the "whiskas" area. You can improvise yourself on how you want this look to be and you can even make the nose pinkish like some other cats but since my "Baby" has black nose, I tried to do a similar look to his. :)

I even conceal my brows and make it higher not like my natural/everyday eyebrow just so I can blend more colors above my crease but the color is not showing up here cos technically, my camera sucks or perhaps the lighting. :/ Be generous with the highlight at your inner tear duct and to make sure to sharpen that too so that you have this cat eye effect eyes.


Here's a picture with my Hitler. Haha. He was given this nickname when I brought him to a Pet Fair sometime this year and he was adored by many people and eventually they called him Hitler. Why? It's because of his black nose. They said it looked like Hitler's moustache. hahahha. I cracked up hearing that and thank goodness he's not like Hitler! ;p


So what do you think about this look? :)

Halloween Makeup | Broken


Hi! I know this is such a late post but I'd like to show more of this look here. As I mentioned on my instagram, this is actually the first time I'm doing this look and I realised that the lines were too thick because when a mirror breaks, they tend to have slim/shard edges. I think I can improve more on this. Haha.. Luckily it didn't look like a cobweb! >.<

Basically I used a liquid liner to map out the lines and shade them to make it thicker etc and if I make a mistake, I will just use a cotton bud with a tiny amount of makeup remover and erase off the marked lines and sharpen it using concealer.

Quite an easy look but not as easy as you think. You have to make it realistic which I think I still need to improve on. So that's it! Hope you enjoyed reading this post.

xx

Thursday, 9 October 2014

Basic Neutrals x Anastasia Beverly Hills


As always, I've been using Neutral shades and that's one of my basic makeup look. I never like doing any fancy eye look using bright or non other than neutral shades except for when it's for my blog and  when I am not going out (purely for blog).

Recently, I purchased Anastasia Beverly Hills Dipbrow Pomade and I absolutely LOVE this product! Ever since I got my hands on the Beauty Express Brow Powder (before trying the Dipbrow Pomade), I have been using it almost every single day without fail and did not even bother switching to other product(s) such as my Artistry Automatic Brow Pencil, Maybelline and/or Sleek Brow Pencil. 

BUT....... once I tried the Dipbrow Pomade, I told myself, this is the one!! This is it! Haha...  What I meant was, Diprow Pomade gives me the shape of my eyebrow better compared to using powder and somehow to me, Dipbrow Pomade applies lighter product on my eyebrow compared to the powder. *shrugs shoulder* Well, according to me. :)

Dipbrow Pomade tend to take lesser brow drawing time compared to powder. Trust me, it ever took me 20 mins to draw my brow using my Beauty Express Brow Powder. Idk why but yeah.. it just happened. The only con that I am worried about is whether the product will dry up easily just like gel liners (which dried up like solid). Shall probably wait a few months and see how it goes. I really hope it won't dry up easily.. Like, that whole pot.

Another thing I'd like to rave about the Dipbrow Pomade is that once you apply the product on your brow, it sticks like glue! It lasts all day and it's smudge proof! AMAZINGGG! *thumbs up*


Products used for this look (eyeball):


- CS Hot Pot- M09 (lid)
- Sleek Ultra Matte V2 - Paper Bag ( crease)
- Sleek Ultra Matte V2 - Villain ( Outer crease)
- Sleek Ultra Matte V2 - Flesh ( blend )
- M.A.C Penultimate Liner
- Lavielash - Heather


Friday, 29 August 2014

Tips to Sweat Proof Make-up


Even if you're not getting soaked or crying under the hot sun, the best thing you need is definitely a WATERPROOF product especially for the eyes. The key to a Sweat Proof Make-up is your foundation. Try and find something that has SPF in it or is meant for this hot weather such as Smashbox Camera Ready BB Cream. Products that has SPF in it protects your skin from the sun and since I went to River Safari, I definitely need to do a  Sweat Proof Make-up on myself which I did! Now let's get started with my tips. Or should I say; I think they are quite Sweat Proof as it does for me. Hah!

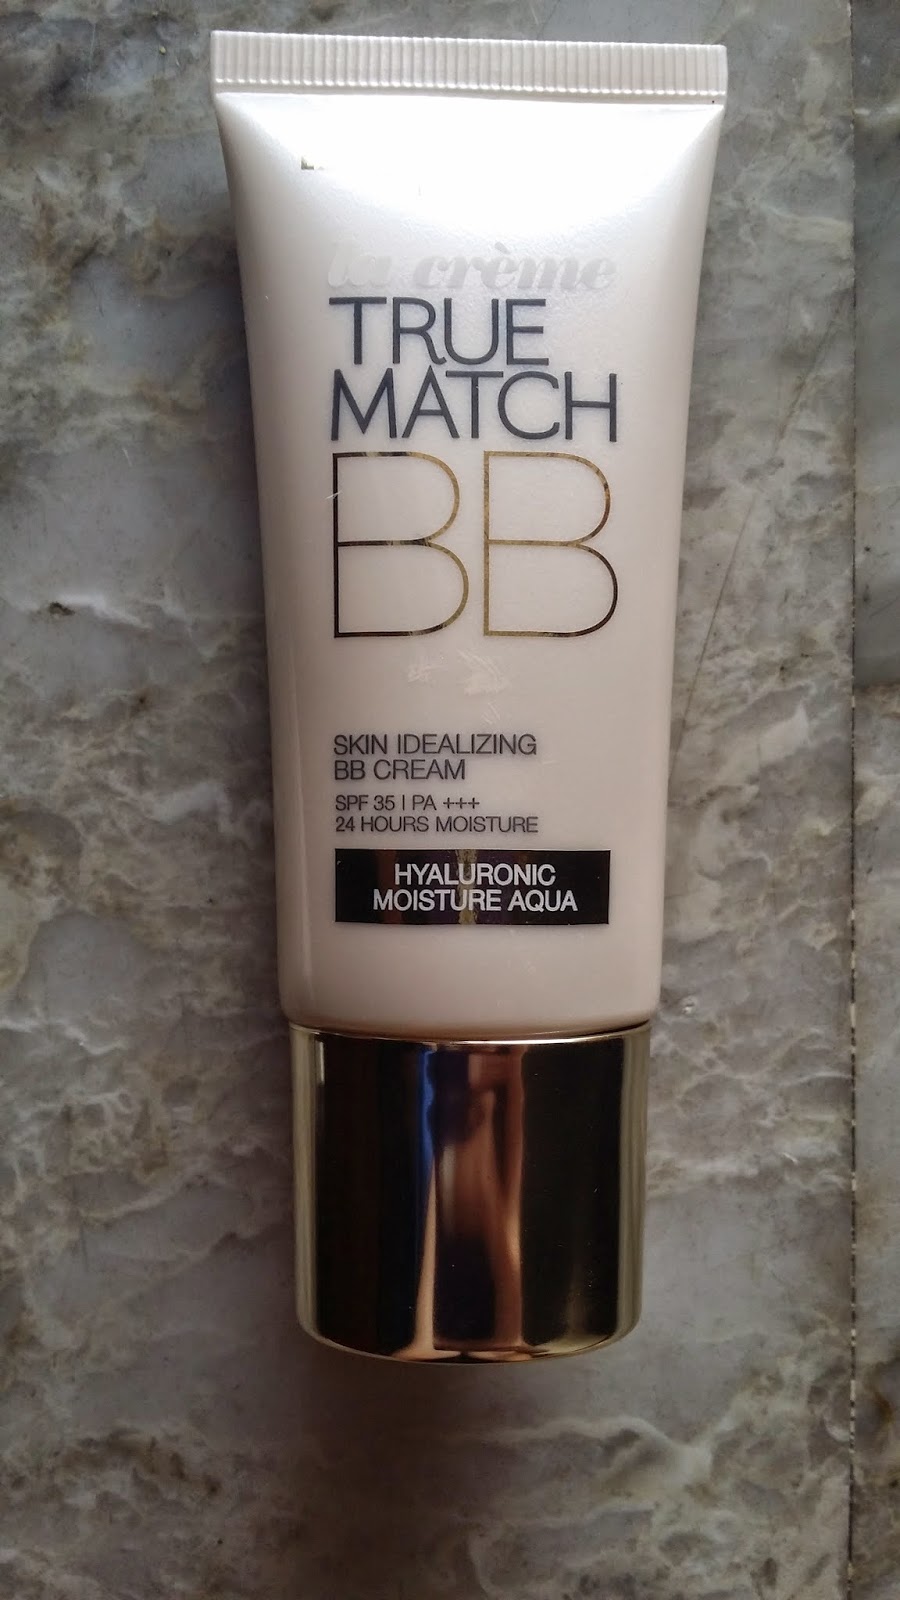
First things first, I applied a base and my base is L'oreal True Match BB in Gold BB. I applied a tiny amount enough to cover any imperfections and blend it well using my brush. This helps to absorb the second layer that I will be applying next and prevent the makeup from smudging or wiped off unless you use a make-up remover. 

As mentioned, next, I will be applying my ALL TIME FAVORITE Farmasi CC Cream. Apply a generous amount and if you want more coverage, you can apply 2 layers of this. Usually I apply only 1 layer and blend them wellllll... The key is; BLENDING! ;) Now you're almost done. You may apply concealer if you think you need extra coverage especially under those eyes but I don't. I'm never a fan of concealer (they crease too much).

After which, I use the fluffiest brush (RT Blush Brush) to apply powder on all over my face and neck to set the products on my face. Be sure not to apply too much else you'll look like an old lady with lots or wrinkles due to the creasing from the powder and makes your skin super dry! Again, be generous. Not greedy! 

Basically these two steps are the key to my Sweat Proof Make-up. Easy isn't it? I am not sure whether this apply to all kinds of skin types but I do have a combination of dry & oily skin and this works perfectly fine. I never touch up my makeup but I just pat off the excess oil on my T-zone area with a tissue.

Not forgetting WATERPROOF Mascara and eyeliner if you don't want to look like a Panda alright! All the best!

Products Used:

L'oreal BB Cream
Farmasi CC Cream
Milani Face Powder 03
Majolica Majorca Waterproof Mascara
Anastasia Beverly Hills Brow Expert in Brunette
UD Naked Flushed Blush Trio in Native
Lip Balm (can't recall the brand)


Wednesday, 11 June 2014

My Favorite: M.A.C Lipsticks

Finally, I am back with another post. Have been busy lately.. Alright! The latest post is about My Favorites: M.A.C Lipstick and here, I will be showing you my 6 favorite shades from M.A.C and this can definitely be an idea for those who is uncertain about which color to get and whether you should get matte ones, sheer or satin or dark colors etc.

For me, I prefer a matte based lipstick because matte lipsticks usually last way longer than non-matte lipsticks. To start with, M.A.C has different types of base for their lipsticks such as cremesheen, lustre and satin. I will usually get the color that I want and not bother about whether I should get matte or cremesheen or amplified although matte works the best for lasting issues.

It depends on individual. If you prefer only matte lipsticks, go ahead. Ok, enough of my babbling and below are the swatches of the 6 lipstick shades that I adore and applied the most on my lips. It wasn't planned but surprisingly, there are 3 neutral and 3 dark/bright shades. I'm definitely in between. Hehe..


Left (top to bottom):
Morange - Amplified
Faux - Satin

Center (top to bottom):
Viva Glam V - Lustre
Speak Louder - Cremesheen

Right (top to bottom):
Ruby Woo - Matte 
Shy Girl - Cremesheen


From left to right:
 Speak Louder, Shy Girl, Ruby Woo, Viva Glam V, Morange, Faux

---------------------------------------------------------------------------------------------------------------------------------

If you have any queries about the different types of lipsticks M.A.C carries and what does the Amplified/Satin/Lustre stands for or what is/are the best shade for beginners, do not hesitate to contact me via the Contact Form and I will be glad to reply any of your doubts/question(s). (:

Till my next post,
Imaah <3

Sunday, 25 May 2014

How to: Match Your Foundation


Hello makeup lovers! Suddenly I just thought of sharing some tips on how to match your foundation. This is always the trickiest part especially when you buy foundation online. As for me, I always avoid buying online UNLESS, I already own that product and that I already know my shade. 

Tips for Matching Your Foundation:

  • If it happens that the foundation has no tester, the best way to find the matching foundation is to hold the bottle up to your jaw line instead of matching it with your hands or neck or arms etc. Usually parts of your face will be the one that you should match the foundation. 
  • Most makeup stores will have testers. This is better because you can test the foundation on your skin. Try to remove a small amount of makeup on your jawline and blend the foundation on your skin. If the shade that you choose blends into your skin, means you've found your shade! But if it appear lighter or darker, try a different shade.
  •  Also be reminded that sometimes foundation out of the bottle won't match your skin perfectly. This happen to me when it comes to my Artistry Foundation. I have to mix two shades; a slightly lighter than my skin tone and a slightly darker than my skin tone to match my skin perfectly. It's kind of a trial and error to find the perfect combination.
  • Always be prepared to get a foundation that is 1 shade darker than your skin tone. Since our country is super hot & humid, you may not know when you'll get tanned under the hot sun. When I am out under the sun doing activities w/o any makeup, I tend to be slightly darker than usual. This is when I'll need my NYX Stay Matte But Not Flat Foundation. ;)
  • If your skin has a pink undertone or if the veins on your wrist appear blue, choose a "c" for cool shade but if the veins on your wrist looks green, choose a "w" for warm shade. If you are uncertain, you can always choose a "n" for neutral shade. 
Here's the end of my post and hopefully these tips are helpful to you. I always apply tip 1 and tip 3 when purchasing my foundation since I am used to choosing my shade for a certain brand. Till my next post! 


Sunday, 18 May 2014

May Bellabox


~~~~~~~~~~~~~~~~~~~~~~~~~~~~~~~~~~~~~~~~~~~~~~~~~~~~~~~~~~~~~~~~~~~~~~~~


ASIENCE Leave-On Treatment Milk


Dr. Jart Bounce Beauty Balm


Activa Starter Acerola Vitamin C


Jacqueline Burchell Singapore Nail Lacquer
Himalaya Gentle Exfoliating Walnut Scrub


The Balm Cheek & Lip Cream in Pie


Sebastian Color Ignite Color Protection Conditioner and Shampoo


_______________________________SHOP THE POST______________________________